Home Blog Page 469

How to Install a Free SSL Certificate on cPanel (Let’s Encrypt Guide)

0

How to Install a Free SSL Certificate on cPanel Using Let’s Encrypt

Installing a free SSL certificate from Let’s Encrypt on a cPanel-managed hosting can significantly enhance your website’s security by encrypting data transferred between your server and your visitors. Here’s a step-by-step guide on how to set this up:

1. Check for AutoSSL

Before manually installing Let’s Encrypt, check if your hosting provider offers AutoSSL (cPanel’s built-in SSL management feature) which automatically installs and renews Let’s Encrypt SSL certificates for all domains configured in your account.

  • Log into cPanel: Access your hosting dashboard.
  • Find the ‘SSL/TLS Status’: This tool is often found under the ‘Security’ section.
  • Check AutoSSL: If enabled, your domains should be covered automatically. If not, or if you prefer to use Let’s Encrypt directly, proceed with the following steps.

2. Enable Let’s Encrypt with AutoSSL

If your host supports AutoSSL but hasn’t enabled Let’s Encrypt:

  • Access WHM (Web Host Manager): You’ll need root access to WHM to change this setting.
  • Navigate to ‘Manage AutoSSL’: Usually found under the ‘SSL/TLS’ section.
  • Select Provider: Choose ‘Let’s Encrypt’ as the provider and agree to the terms of service.
  • Enable AutoSSL: Apply AutoSSL to your domains. WHM will automatically install and periodically renew the SSL certificates.

3. Manual Installation of Let’s Encrypt

If AutoSSL isn’t available or you prefer a more manual approach:

  • Access SSH: Connect to your server via SSH.
  • Install Certbot: Certbot is a Let’s Encrypt client that simplifies the process of obtaining and installing SSL certificates. Install Certbot by running:
    sudo yum install certbot python2-certbot-apache  # For CentOS/RHEL
    sudo apt-get install certbot python-certbot-apache  # For Debian/Ubuntu
    
  • Generate Certificate: Execute Certbot to generate the SSL certificate:
    sudo certbot --apache -d yourdomain.com -d www.yourdomain.com
    

    Replace yourdomain.com with your actual domain name.

4. Manual Configuration in cPanel

If you installed the SSL certificate via Certbot without cPanel/WHM integration:

  • Log into cPanel: Go to the SSL/TLS manager.
  • Install and Manage SSL: Find the section to manage SSL sites.
  • Install SSL Certificate: Copy and paste the certificate (CRT), private key (KEY), and CA bundle (CABUNDLE) into the appropriate fields for your domain. These files are typically located in /etc/letsencrypt/live/yourdomain.com/.

5. Verify Installation

  • SSL Check: Use an online tool like SSL Labs’ SSL Test to check if the SSL certificate is installed correctly and functioning as expected.
  • Browser Padlock: Visit your website and ensure that browsers show a secure padlock icon, indicating that SSL is working properly.

6. Setup Automatic Renewal

Let’s Encrypt certificates are valid for 90 days, so setting up automatic renewal is crucial:

  • Cron Job for Renewal: Add a cron job to run the renewal command periodically:
    0 2 * * * /usr/bin/certbot renew --quiet
    

    This command attempts to renew any expiring certificates at 2:00 AM daily.

By following these steps, you can successfully install a free SSL certificate from Let’s Encrypt on your cPanel server, enhancing your website’s security and trustworthiness without incurring additional costs.

How to Build a Scalable Hosting Environment on a Budget VPS

0

Creating a scalable hosting environment on a budget Virtual Private Server (VPS) involves careful planning, optimization, and leveraging the right technologies. Here’s how to achieve scalability without breaking the bank:

1. Choose the Right VPS Provider

  • Resource Scalability: Opt for a VPS provider that offers easy scalability options. This allows you to increase CPU, RAM, and storage resources as your needs grow without migrating to a new server.
  • Cost-Effectiveness: Compare different providers and plans to find one that offers the best balance between cost, performance, and scalability. Consider providers that offer burstable resources during traffic spikes.

2. Optimize Server Configuration

  • Operating System: Choose a lightweight operating system, such as Ubuntu Server or CentOS, which can be stripped down to the essentials to save on system resources.
  • Web Server Software: Use efficient web server software. For instance, Nginx is known for its performance and low resource consumption compared to Apache, especially under scale.

3. Implement Advanced Caching Mechanisms

  • Content Delivery Network (CDN): Implement a CDN to offload the delivery of static resources like images, CSS, and JavaScript files. This reduces the load on your VPS and improves user experience by decreasing load times.
  • Caching Tools: Use caching tools like Varnish for HTTP caching and Redis or Memcached for object and database caching. These tools can significantly improve the response time and reduce the load on the server.

4. Utilize Cloud and Hybrid Solutions

  • Hybrid Hosting: Consider a hybrid approach where critical components run on the VPS, and additional scalable resources like storage or databases are handled by cloud services. This can be cost-effective and allow you to scale specific aspects of your hosting environment.
  • Microservices Architecture: Where possible, use a microservices architecture to decentralize services and applications. This allows you to scale individual components independently in the cloud, reducing the load on your VPS.

5. Database Optimization

  • Database Management: Regularly optimize your database by performing tasks like indexing, regular clean-ups of old data, and using efficient queries. Consider using a separate database server if your database load becomes too high for a single server setup.
  • Replication and Load Balancing: Implement database replication and load balancing to distribute the load across multiple servers or services, improving performance and redundancy.

6. Automate Monitoring and Scaling

  • Monitoring Tools: Use tools like Nagios, Zabbix, or Prometheus to monitor your server’s performance and resource utilization continuously.
  • Auto-Scaling: Set up scripts or use third-party services that can automatically add resources or optimize configurations based on traffic and load metrics.

7. Regular Performance Testing

  • Stress Testing: Regularly perform stress tests and load testing to identify potential bottlenecks and performance issues as you scale. This helps you understand how your server handles increased loads.
  • Performance Tuning: Based on testing results, continually tune and optimize your server settings, code, and configurations to handle greater loads effectively.

8. Leverage Virtualization Technologies

  • Containers: Use containerization technologies like Docker for deploying applications. Containers consume fewer resources than traditional virtual machines and allow for rapid provisioning and scaling.

By following these strategies, you can build a scalable hosting environment on a budget VPS, ready to handle increased loads and growth without necessitating a significant initial investment. This approach ensures that your infrastructure can adapt to changing demands efficiently and cost-effectively.

How to Protect Customer Data on a Reseller Hosting Server

0

Ensuring the protection of customer data on a reseller hosting server is crucial for maintaining trust, complying with legal and regulatory requirements, and preventing security breaches. Here are strategies to effectively secure customer data on your reseller hosting server:

1. Implement Strong Access Controls

  • Use Strong Passwords: Enforce strong password policies for all accounts on the server. Passwords should include a mix of upper and lower case letters, numbers, and symbols.
  • Two-Factor Authentication (2FA): Implement two-factor authentication for accessing the hosting control panel and any other critical systems to add an extra layer of security.

2. Secure File Transfers

  • Use Secure Protocols: Ensure that all file transfers are done using secure protocols such as SFTP (Secure File Transfer Protocol) or FTPS (File Transfer Protocol Secure) instead of plain FTP to protect data in transit.

3. Regularly Update Software

  • Apply Updates and Patches: Keep all software on the server, including the operating system, control panel software like cPanel/WHM, and applications, up-to-date with the latest security patches and updates. This helps protect against vulnerabilities.

4. Utilize Network Security Measures

  • Firewalls: Configure and maintain a robust firewall to monitor and control incoming and outgoing network traffic based on predetermined security rules.
  • Intrusion Detection Systems (IDS): Implement an IDS to detect and alert on suspicious activities or potential security breaches.

5. Data Encryption

  • Encrypt Sensitive Data: Use encryption to protect sensitive data stored on the server. Ensure that databases storing customer information are encrypted.
  • SSL Certificates: Use SSL/TLS certificates to secure data transmissions between the server and clients’ browsers, particularly for any web applications hosted on the server.

6. Isolate Customer Accounts

  • Account Isolation: Use account isolation techniques to ensure that each hosting account is segregated and cannot interfere with or access data from other accounts on the server.

7. Regular Backups

  • Automated Backups: Set up automated backups to regularly backup customer data and system configurations. Store backups in multiple locations, and ensure at least one copy is off-site for disaster recovery purposes.
  • Backup Encryption: Encrypt backup data to protect it during storage and transit.

8. Monitor Server Activity

  • Logging and Monitoring: Implement comprehensive logging and monitoring to keep track of all activities on the server. Use monitoring tools to detect unusual patterns that could indicate a security threat.
  • Audit Trails: Maintain audit trails for actions performed by users or administrators that affect data or system configurations.

9. Secure Web Applications

  • Web Application Firewalls (WAF): Deploy a WAF to protect hosted web applications from common vulnerabilities and attacks, such as SQL injection, cross-site scripting (XSS), and cross-site request forgery (CSRF).
  • Regular Vulnerability Scanning: Conduct regular vulnerability scans of web applications and remediate any vulnerabilities identified.

10. Compliance and Legal Considerations

  • Stay Informed: Keep up-to-date with legal and regulatory requirements regarding data protection, such as GDPR, HIPAA, or others relevant to the geographical location of your customers or your business.
  • Privacy Policy and Terms of Service: Ensure that your reseller hosting business has a clear and compliant privacy policy and terms of service that outline how customer data is handled and protected.

By implementing these security measures, you can significantly enhance the protection of customer data on your reseller hosting server. This not only helps in complying with data protection regulations but also builds customer trust and confidence in your services.

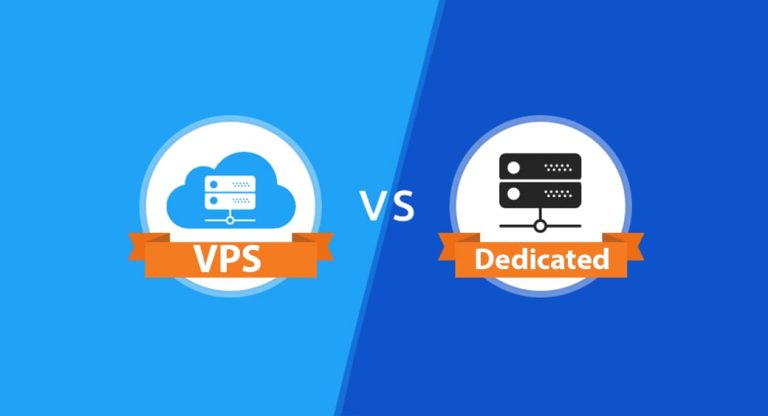
How to Determine If You Need a VPS or a Dedicated Server

0

Choosing the right type of hosting between a Virtual Private Server (VPS) and a dedicated server depends on several factors including your website’s requirements, budget, and expected growth. Here’s how you can determine which option is best suited for your needs:

1. Assess Your Resource Requirements

  • Traffic Volume: Evaluate the amount of traffic your website currently receives and anticipate future growth. High-traffic sites, especially those experiencing rapid growth, may require the robust capabilities of a dedicated server.
  • Resource Usage: Consider the resources required by your applications. Complex databases, extensive backend processing, and large amounts of media (videos, images) will need more CPU, RAM, and storage. If your site consistently uses a high amount of resources and demands stability, a dedicated server might be necessary.

2. Consider Performance and Reliability

  • Performance Needs: If your website must handle high-performance applications or you require consistent and high-speed performance, a dedicated server provides the necessary resources without the variability that can come with a VPS, as a VPS still involves sharing physical server hardware with other VPS instances.
  • Reliability and Uptime: For businesses where uptime is critical (e.g., e-commerce platforms), a dedicated server’s reliability is beneficial due to dedicated hardware resources, which can minimize the risk of downtime.

3. Examine Security Requirements

  • Sensitive Data Handling: If your website handles sensitive information (like personal data, credit card information), a dedicated server offers a more secure environment because you are not sharing the server with any other clients, reducing the vulnerability to breaches.
  • Compliance Needs: For industries that are regulated and require certain standards for data security (like HIPAA in healthcare or PCI DSS for payment data), dedicated servers provide a controlled environment that is easier to secure and audit.

4. Analyze Scalability Needs

  • Scalability: While both VPS and dedicated servers are scalable, the scalability of a VPS is generally easier and quicker to manage as resource adjustments can be made virtually without needing physical hardware changes. Dedicated servers can also be scaled but may require additional physical hardware which can be more costly and time-consuming.

5. Budget Considerations

  • Cost Efficiency: VPS hosting generally offers a middle-ground cost. It’s more expensive than shared hosting but significantly cheaper than renting an entire dedicated server. If budget constraints are a significant factor and your current resource demands are moderate, a VPS might be more appropriate.
  • Long-term Investment: While dedicated servers are more expensive, they can be a worthwhile investment for high-traffic, resource-heavy sites, offering long-term benefits in performance and stability.

6. Technical Skills

  • Server Management: Both VPS and dedicated servers require some level of technical skill, but managing a dedicated server may require a deeper knowledge due to the complexity and control it offers. Consider whether you have access to the necessary skills, either in-house or through managed hosting services, which can handle server maintenance for you.

7. Customization Needs

  • Software and Control: If you need to install custom or specialized software on your server, or require specific configurations, a dedicated server provides you with full root access and control over the server environment, unlike a VPS, which might have limitations due to its virtual nature and shared host system.

By carefully considering each of these factors, you can make an informed decision on whether a VPS or a dedicated server is the right hosting solution for your specific needs. It’s important to weigh the pros and cons of each based on your technical requirements, security needs, performance expectations, budget constraints, and long-term business goals.

How to Troubleshoot Common cPanel Errors on Your VPS

0

How to Troubleshoot Common cPanel Errors on Your VPS

When managing a Virtual Private Server (VPS) with cPanel, you may occasionally encounter errors. Effective troubleshooting can help you resolve these issues quickly and maintain the stability and performance of your server. Here are some strategies to troubleshoot common cPanel errors on your VPS:

1. Internal Server Errors (500 Error)

  • Check Error Logs: The first step in troubleshooting any server issue, particularly 500 errors, is to check the Apache and PHP error logs. You can find these in /usr/local/apache/logs/error_log and /usr/local/cpanel/logs/error_log.
  • File Permissions: Incorrect file permissions can often cause 500 errors. Ensure that files are set to 644 and directories to 755.
  • .htaccess Issues: Corrupt or misconfigured .htaccess files can also lead to 500 errors. Temporarily rename your .htaccess file (e.g., to .htaccess.bak) to see if this resolves the issue.

2. Database Connection Errors

  • Database Credentials: Verify that the database username, password, and hostname in your application’s configuration file (like wp-config.php for WordPress) are correct.
  • User Privileges: Check that the database user has the correct privileges. This can be done via cPanel’s MySQL Databases section.
  • Server Overload: High server load can sometimes cause intermittent database connection issues. Monitor your server’s resource usage to ensure it’s not overloaded.

3. Email Delivery Issues

  • Mail Queue Manager: Use WHM’s Mail Queue Manager to check for any undelivered emails and identify the cause of the delivery issues.
  • Check MX Records: Ensure that your domain’s MX records are correctly set up in the DNS zone editor in cPanel.
  • SPF and DKIM Records: Verify that SPF and DKIM records are correctly configured to improve email deliverability and prevent emails from being marked as spam.

4. DNS Issues

  • DNS Configuration: Check the DNS zone settings in cPanel’s Zone Editor to ensure that A, CNAME, and MX records are properly configured.
  • Propagation Time: Remember that DNS changes can take up to 48 hours to propagate fully. Use tools like dig or nslookup to verify DNS configurations.

5. SSL/TLS Certificate Errors

  • AutoSSL: If using AutoSSL, check the AutoSSL log in cPanel for any issues during the certificate issuance process.
  • Manual Installation Checks: For manually installed certificates, ensure that the certificate matches the private key and that the CA bundle is correctly installed.

6. WHM/cPanel Access Issues

  • Root Password: If you’re unable to log into WHM, you may need to reset the root password via your VPS control panel provided by your hosting service.
  • Firewall Settings: Ensure that your IP isn’t blocked by the firewall. You can check and manage this through WHM’s Host Access Control and ConfigServer Security & Firewall (if installed).

7. Performance Issues

  • Resource Usage: Check resource usage via WHM’s “Show Current CPU Usage” and “Show Current Disk Usage.” Excessive usage can indicate the need for optimization or an upgrade in resources.
  • Optimize Apache and MySQL: Use WHM’s optimization features to adjust Apache and MySQL settings for better performance.

8. Regular Maintenance and Monitoring

  • Updates: Keep cPanel, WHM, and all server software up to date to avoid issues caused by bugs in older versions.
  • Backups: Ensure that regular backups are being performed and stored in a remote location. This allows you to restore the previous state if a severe problem occurs.

By systematically addressing these common areas, you can effectively troubleshoot and resolve many of the typical issues encountered with cPanel on a VPS. Regular monitoring and preventative maintenance can also help minimize the occurrence of these errors.

How to Integrate WHMCS with Your Reseller Hosting Business

0

Integrating WHMCS (Web Host Manager Complete Solution) with your reseller hosting business is a strategic move to streamline operations, automate billing, and enhance customer management. WHMCS is a powerful tool that can manage and automate many aspects of a hosting business. Here’s how you can integrate WHMCS into your reseller hosting operations effectively:

1. Purchase and Install WHMCS

  • License Purchase: Buy a WHMCS license from either WHMCS directly or through a reseller that offers discounts. Some hosting providers also offer WHMCS as part of their reseller packages.
  • Installation: You can install WHMCS directly on your hosting account. Most providers offer an easy one-click installation process via their control panel, or you can manually install it by downloading the latest version from the WHMCS website and following their installation guide.

2. Configure WHMCS for Your Hosting

  • Initial Setup Wizard: When you first access your WHMCS admin panel, the setup wizard will guide you through the basic configuration, including system URLs, database setup, and administrative contact details.
  • Payment Gateways: Configure payment gateways to accept payments. WHMCS supports a wide range of payment processors like PayPal, Stripe, and credit card processing. This setup involves entering API keys and configuring payment settings according to your preferences.

3. Connect WHMCS to Your Reseller Account

  • Server Configuration: Integrate WHMCS with your reseller hosting account by adding your server in the WHMCS admin panel under ‘Setup’ > ‘Products/Services’ > ‘Servers’. You’ll need to input your server’s details, including the API credentials, IP address, and type of control panel (e.g., cPanel/WHM).
  • WHM API Access: Ensure that your hosting account’s WHM panel is set up to allow API access, which WHMCS uses to communicate with the server for account creation, suspension, and other functions.

4. Set Up Hosting Products and Services

  • Create Products: In WHMCS, set up your hosting plans as products. Navigate to ‘Setup’ > ‘Products/Services’ > ‘Products/Services’ and create new products. Here, you’ll define the product name, description, pricing, and link each product to the server and hosting package previously set up in WHM.
  • Automate Provisioning: Configure WHMCS to automatically provision hosting accounts upon payment. Set up the module and server settings within each product configuration to automate this process.

5. Customize the Client Area

  • Branding: Customize the client area to match your company’s branding. This can be done through WHMCS’s theme management system where you can adjust colors, logos, and layouts.
  • Custom Templates: You can create custom templates or modify existing ones to enhance the client interface’s functionality and aesthetic appeal.

6. Implement Support Systems

  • Support Tickets: Configure the support ticket system to handle customer inquiries and issues. WHMCS provides tools for managing support tickets, including department management, ticket assignments, and escalation rules.
  • Knowledge Base: Develop and populate a knowledge base within WHMCS to provide clients with self-help resources and reduce the number of support tickets.

7. Ensure Security

  • Secure WHMCS: Implement security measures such as SSL encryption for your client area, use two-factor authentication for admin and client logins, and regularly update WHMCS to protect against vulnerabilities.

8. Monitor and Optimize

  • Analytics and Reporting: Use WHMCS’s built-in reporting features to monitor business performance, track income, and manage expenditures. Regularly review these reports to identify trends and areas for improvement.

Integrating WHMCS with your reseller hosting business not only automates many aspects of the business but also provides a professional interface for your clients. By following these steps, you can ensure a smooth integration of WHMCS, resulting in an efficient, scalable, and client-friendly hosting business.

How to White-Label Your Reseller Hosting Services

0

White-labeling your reseller hosting services allows you to offer hosting to clients under your own brand name, rather than that of your primary hosting provider. This is crucial for establishing a distinct brand identity and building trust with your customers. Here’s how you can effectively white-label your reseller hosting services:

1. Choose a White-Label Capable Hosting Provider

  • Provider Selection: Select a hosting provider that supports white-labeling. This means they allow you to use your branding on all client interfaces without revealing their own brand.
  • Anonymous Nameservers: Ensure the provider offers the option to use anonymous or private nameservers, which can be branded as your own.

2. Set Up Branded Nameservers

  • Register Nameservers: Register private nameservers with your domain (e.g., ns1.yourdomain.com and ns2.yourdomain.com) through your domain registrar. This often involves assigning the IP addresses provided by your hosting company to these nameservers.
  • Configure Nameservers in WHM: Configure these nameservers in your Web Host Manager (WHM), which will be used for all customer sites under your reseller account.

3. Customize the Control Panel

  • cPanel Branding: Use the Branding Editor in WHM to customize the look and feel of the client cPanel interfaces. You can add your logo, company name, and color schemes that align with your brand identity.
  • Custom Themes: You can create or modify existing themes to apply across all cPanel accounts you manage, enhancing the uniformity of your branding.

4. Utilize a White-Labeled Billing System

  • Billing Software: Choose a billing system like WHMCS, which supports complete customization and white-labeling. This software handles client management, billing, and support under your brand.
  • Integration: Ensure the billing system integrates seamlessly with your cPanel/WHM setup, allowing for automated account provisioning and management.

5. Develop a Branded Support System

  • Support Portal: Set up a customer support portal that uses your domain and brand. This can be integrated with your billing system, which typically includes support ticketing functionality.
  • Knowledge Base: Create a knowledge base or FAQ section branded with your company’s style and logo. This helps reduce support tickets and provides a self-help tool for your clients.

6. Marketing Materials

  • Email Communications: Customize all client communications, such as welcome emails, billing notifications, and support correspondences, to have your branding and tone of voice.
  • Promotional Materials: Ensure all your promotional materials, including your website, digital ads, and brochures, reflect your branding to maintain consistency and reinforce your brand identity.

7. Legal and Compliance Considerations

  • Service Agreements: Develop service agreements and terms of use that reflect your business’s name, not your provider’s. This includes privacy policies and any other legal documentation.
  • Data Handling and Security: Ensure compliance with data protection regulations under your brand, especially if you are handling sensitive information.

8. Regularly Update and Maintain Your Branding

  • Consistency Across Platforms: Regularly review your branding across all platforms to ensure consistency. As you update your brand, make sure to apply these changes across all tools and client interfaces.
  • Feedback and Adaptation: Solicit feedback from clients regarding their user experience and make adjustments to your branding and services as necessary.

By thoroughly white-labeling your reseller hosting services, you establish a professional and trustworthy brand in the eyes of your clients. This strategy not only enhances customer loyalty but also sets your services apart from competitors in a crowded market.

Securing Your Online Assets: How Tremhost’s VPS Hosting Safeguards Your Business

0

In the rapidly evolving digital landscape, cybersecurity has become a paramount concern for businesses of all sizes. As our reliance on online platforms and cloud-based services continues to grow, the risk of falling victim to malicious cyber threats, such as data breaches, ransomware attacks, and distributed denial-of-service (DDoS) incidents, has never been higher.

Ensuring the security and integrity of your online assets is no longer a nice-to-have, but a critical imperative that can make or break your business. This is where a robust and security-focused hosting solution, like Tremhost’s VPS (Virtual Private Server) hosting, becomes an invaluable asset in safeguarding your digital presence.

The Escalating Cybersecurity Challenges Facing Businesses

In the digital age, businesses are confronted with a growing array of cybersecurity threats that can have devastating consequences on their operations, reputation, and bottom line. Some of the key security challenges include:

  1. Data Breaches: Cybercriminals are constantly seeking to gain unauthorized access to sensitive customer data, intellectual property, and financial information, which can result in costly legal battles, regulatory fines, and irreparable damage to your brand’s reputation.
  2. Ransomware Attacks: Malicious actors are increasingly deploying sophisticated ransomware to hold your data and systems hostage, demanding hefty payments in exchange for the release of your critical information.
  3. DDoS Assaults: Distributed denial-of-service (DDoS) attacks can overwhelm your website or web application, causing service disruptions and leaving your business unable to serve its customers.
  4. Insider Threats: Malicious insiders, such as disgruntled employees or contractors, can pose a significant risk to your organization, exploiting their access privileges to compromise your data and systems.
  5. Compliance Failures: Failing to adhere to stringent data privacy regulations, such as GDPR or HIPAA, can result in hefty fines and irreparable damage to your brand’s reputation.

Tremhost’s Comprehensive Security Measures for VPS Hosting

To help businesses overcome these escalating cybersecurity challenges, Tremhost has implemented a comprehensive suite of security measures within their VPS hosting infrastructure, providing an additional layer of protection for your online assets.

  1. Firewalls: Tremhost’s VPS hosting plans feature industry-leading firewall solutions that vigilantly monitor and filter incoming and outgoing traffic, proactively blocking unauthorized access attempts and potential cyber threats.
  2. DDoS Protection: Tremhost’s VPS hosting is fortified with robust DDoS mitigation technologies, capable of detecting and mitigating distributed denial-of-service attacks in real-time, ensuring your website or web application remains accessible and operational during times of crisis.
  3. Intrusion Detection and Prevention: Tremhost’s VPS hosting infrastructure is equipped with advanced intrusion detection and prevention systems that continuously monitor for suspicious activity, rapidly identifying and neutralizing potential security breaches.
  4. Secure Server Configurations: Tremhost’s VPS servers are meticulously configured with the latest security patches, updates, and best practices, minimizing the risk of vulnerabilities that could be exploited by cybercriminals.
  5. Secure Data Storage: Tremhost’s VPS hosting solutions leverage enterprise-grade storage technologies, including high-performance NVMe drives, to ensure the safe and reliable storage of your critical data, protecting it from physical damage, data loss, or unauthorized access.
  6. Comprehensive Backups: Tremhost’s VPS hosting plans include automated backup solutions, enabling you to quickly restore your website, application, or data in the event of a security incident or system failure, minimizing downtime and preserving business continuity.

Real-World Examples of Tremhost’s Security-Focused VPS Hosting in Action

The security-focused approach of Tremhost’s VPS hosting solutions has proven invaluable for businesses facing a wide range of cybersecurity threats. Here are a few real-world examples of how Tremhost’s robust security measures have protected their customers:

E-commerce Platform: Artisan Emporium
Artisan Emporium, an online marketplace for handcrafted products, faced a series of DDoS attacks that threatened to cripple their website and disrupt their operations. Thanks to Tremhost’s DDoS protection capabilities, the Artisan Emporium team was able to quickly mitigate the attacks, ensuring their customers could continue to access and shop on their platform without interruption.

SaaS Provider: Productivity Pro
Productivity Pro, a cloud-based project management tool, was the target of a sophisticated data breach attempt. Tremhost’s advanced intrusion detection and prevention systems, combined with their secure server configurations, successfully identified and neutralized the threat, protecting Productivity Pro’s sensitive customer data and preserving the trust of their user base.

Digital Agency: Webcraft Solutions
Webcraft Solutions, a digital agency that manages websites and web applications for its clients, relied on Tremhost’s VPS hosting to safeguard their clients’ online assets. When one of Webcraft’s clients experienced a ransomware attack, the agency was able to quickly restore the affected systems and data from Tremhost’s comprehensive backup solutions, minimizing downtime and ensuring business continuity for their client.

Safeguard Your Online Presence with Tremhost’s VPS Hosting

In the ever-evolving digital landscape, the security of your online assets has never been more critical. By partnering with Tremhost and leveraging their security-focused VPS hosting solutions, businesses can proactively protect their digital presence, mitigate the risk of costly cyber threats, and ensure the integrity and availability of their mission-critical systems and data.

Explore Tremhost’s VPS hosting plans today and discover how their comprehensive security measures can help safeguard your business in the digital age.

How to Host Unlimited Websites on One VPS (Using WHM/cPanel)

0

Hosting unlimited websites on a single Virtual Private Server (VPS) using WHM and cPanel is a cost-effective solution for web hosting businesses, developers, and agencies managing multiple client sites. Here’s a step-by-step guide to setting up your VPS to host unlimited websites efficiently:

1. Choose the Right VPS Provider

  • Select a VPS Plan: Choose a VPS plan with sufficient resources (CPU, RAM, storage) to handle multiple websites. Ensure the provider offers scalability options to upgrade resources as needed.
  • Reliability and Uptime: Opt for a provider known for high reliability and uptime, as the performance of all your hosted websites will depend on this.

2. Install WHM/cPanel

  • Purchase a License: cPanel/WHM is not usually free; you’ll need to purchase a license. Some VPS providers offer plans that include a cPanel license.
  • Installation: Most VPS providers offer a one-click installation option for cPanel/WHM, or you can install it manually. Ensure your server’s operating system is compatible with the latest version of cPanel.

3. Configure WHM for Multi-Domain Hosting

  • Initial Setup: When you first log into WHM, run the initial setup wizard. It guides you through setting up server and networking configurations, including hostname, resolvers, and contact email.
  • Create Feature Lists and Packages: In WHM, create packages that define the resources available to different types of websites, such as disk space, bandwidth, database limits, and email accounts. Feature lists control what cPanel features are available to end-users.

4. Create Accounts for Each Website

  • Add Accounts: Use WHM to create new accounts for each website. During the account creation process, you will select the domain name, username, password, and the package of resources for each site.
  • Domain Setup: Make sure each domain name is registered with a domain registrar and that DNS settings are configured to point to your VPS’s IP address.

5. Configure DNS Settings

  • Nameserver Configuration: Set up nameservers in WHM, which can be used by all domains hosted on your VPS. You may use your VPS provider’s nameservers or set up your own.
  • Zone Files: Ensure DNS zone files for each domain are correctly configured in WHM. This involves pointing each domain to the appropriate folder in your server’s file system.

6. Optimize Server Performance

  • Apache and PHP Configuration: Tweak settings in WHM for Apache and PHP to enhance performance, such as adjusting memory limits and execution time.
  • Security and Hardening: Secure your server by configuring firewalls, installing security modules like ModSecurity, and regularly updating all software.

7. Implement Email Solutions

  • Email Configuration: Set up email accounts for each domain using cPanel. Ensure that you configure SPF, DKIM, and DMARC records to improve email deliverability and security.

8. Regular Maintenance and Monitoring

  • Backups: Configure regular backups of your server and all hosted websites. WHM provides tools to automate backups to remote storage solutions.
  • Monitor Usage: Use WHM to monitor resource usage across all hosted websites. Be prepared to scale resources as needed to maintain optimal performance.

9. Provide Client Access

  • cPanel Access: Provide your clients with individual cPanel access for their websites. This allows them to manage their own websites independently within the resource limits you have set.

By following these steps, you can efficiently manage unlimited websites on a single VPS using WHM/cPanel. This setup not only maximizes your server resource usage but also simplifies management tasks and scales operations effectively as your hosting demands grow.

How to Choose a Reseller Hosting Plan That Grows With You

0

Selecting a reseller hosting plan that accommodates growth is crucial for anyone looking to expand their hosting business over time. As your customer base increases, you’ll need more resources and better features without frequent provider switches or costly upgrades. Here’s how to choose a reseller hosting plan that can grow with your business:

1. Assess Your Initial Needs

  • Understand Your Requirements: Estimate the resources you will initially need, such as bandwidth, disk space, and the number of cPanel accounts you plan to manage. Consider your target market’s needs—whether they’re small businesses, bloggers, or larger enterprises.

2. Look for Scalable Solutions

  • Resource Scalability: Choose a provider that offers easy scalability. This means being able to add resources like bandwidth, storage, or additional cPanel licenses as your demand increases without significant downtime or cost penalties.
  • Upgrade Path: Ensure the host provides a clear upgrade path from one plan to another. This can involve moving from basic reseller hosting to more advanced plans or even to VPS or dedicated server solutions as needed.

3. Check for White Label Support

  • Branding Options: A white-label reseller plan allows you to brand your control panels, billing software, and customer communications with your own logo, fostering a stronger brand identity. Check if the provider supports full customization to maintain a consistent branding experience.

4. Evaluate Included Tools and Software

  • Automation Tools: Look for plans that include powerful tools like WHMCS (Web Host Manager Complete Solution) for managing billing and customer support efficiently. Automation can save time and reduce errors as you scale.
  • Integration Features: Consider how well the reseller hosting integrates with other tools and services you might use, such as payment gateways, email marketing software, and security solutions.

5. Consider the Level of Support Offered

  • Support Quality: Reliable customer support from your provider is crucial, especially as your own customer base grows and their demands become more complex. Ensure that the provider offers 24/7 support with a proven track record of timely and effective service.
  • Technical Assistance: As you scale, you might encounter more complex issues or need more detailed technical assistance. Check if the provider offers advanced support, perhaps for an additional fee, which can be invaluable for resolving complicated problems quickly.

6. Analyze Performance and Reliability

  • Server Uptime Guarantees: Opt for hosting providers who offer high uptime guarantees (typically 99.9% or better). Frequent downtime can hurt your reputation and cause customers to leave.
  • Performance Reviews: Look at reviews and testimonials regarding the provider’s server performance and speed. Good server performance is crucial for retaining clients and providing a satisfactory user experience.

7. Review Security Measures

  • Security Protocols: Ensure the hosting provider offers robust security measures including firewalls, intrusion detection, and regular backups. As you grow, the impact of potential security breaches also grows.
  • SSL Certificates: Check if SSL certificates are provided for free or at a reasonable cost, as this is often a basic requirement for your clients.

8. Consider the Cost Efficiency

  • Transparent Pricing: Avoid providers with hidden fees. Look for transparency in pricing to ensure the costs align with your business model without unexpected increases.
  • Cost vs. Features: Balance the cost of the plan against the features offered. Cheaper is not always better if it compromises essential services like support, uptime, or scalability.

By taking these steps, you can choose a reseller hosting plan that not only meets your current needs but also supports your business growth over time. This approach minimizes the need for frequent provider changes, helps maintain service quality, and enhances customer satisfaction as your hosting business expands.