


A subdomain is an extension of your main domain—think blog.yourwebsite.com or shop.yourwebsite.com. Subdomains are great for organizing your website, hosting different sections, or running separate apps (like a forum or store). Setting one up is easier than you might think!
1. Decide on Your Subdomain Name
First, choose what you want your subdomain to be called. Some common examples:
blog.yourwebsite.com(for a blog)shop.yourwebsite.com(for an online store)support.yourwebsite.com(for customer support)
You can use almost any word or phrase (without spaces or special characters).
2. Log in to Your Hosting or Domain Control Panel
- If your hosting provider manages your DNS (common if your nameservers point to your host), log into your hosting account (e.g., Tremhost cPanel or similar).
- If your DNS is managed with your domain registrar, log in there.
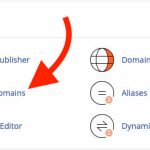
3. Find the Subdomain or DNS Management Section
- In cPanel, look for a section called “Subdomains”.
- In other control panels or registrars, look for “DNS Management,” “Zone Editor,” or similar.
4. Create the Subdomain
If using cPanel or similar hosting control panel:
- Go to Subdomains.
- Enter your subdomain prefix (e.g.,
blog). - Choose your main domain from the dropdown.
- The system will automatically create the subdomain and set up a new folder for its files (like
/public_html/blog). - Click Create.
If editing DNS manually:
- Go to the DNS management section.
- Add a new A record for your subdomain:
- Name/Host: The subdomain prefix (e.g.,
blog) - Type: A
- Value/Points to: The IP address of the server where the subdomain should go (often the same as your main site, unless you’re hosting it elsewhere)
- Name/Host: The subdomain prefix (e.g.,
- Save your changes.
Note: You can also use a CNAME record if you want your subdomain to point to another domain name (such as a hosted blog platform).
5. Upload or Build Your Subdomain’s Content
If your subdomain is hosted on the same server:
- Use your hosting file manager or FTP to upload files to the new subdomain folder (e.g.,
/public_html/blog). - Install a CMS (like WordPress) or upload your site files as needed.
If your subdomain points elsewhere (like an external shop or blog), follow the third-party service’s setup instructions.
6. Wait for DNS Propagation
If you made DNS changes, remember: it can take a few minutes to 24 hours for your new subdomain to become available everywhere.
7. Test Your Subdomain
Type your subdomain (e.g., blog.yourwebsite.com) into your browser. You should see your new site or folder!
In Summary
- Choose your subdomain name.
- Log in to your hosting or DNS control panel.
- Use the Subdomains or DNS management tool to create the subdomain.
- Upload or build content for your subdomain.
- Wait for DNS propagation and test your new subdomain.


