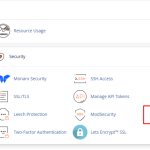

In today’s digital age, ensuring the security of your website is paramount. One of the fundamental steps to securing your site is installing an SSL (Secure Sockets Layer) certificate. An SSL certificate encrypts the data exchanged between a user’s browser and the server, making it difficult for hackers to intercept or tamper with the information. This article provides a detailed guide on how to install an SSL certificate on your website, followed by steps to configure your server for SSL integration. Whether you are a small business owner, a blogger, or managing a large ecommerce platform, these instructions will help you enhance your website’s security and trustworthiness.
Step-by-Step Guide to Installing SSL Certificates
To begin the installation of an SSL certificate on your website, you first need to purchase or obtain a certificate from a certified authority (CA). Once you have your SSL certificate, the process involves several key steps. Start by generating a Certificate Signing Request (CSR) on your server. This request will include your domain name and company details, and it’s essential for the CA to generate your certificate.
After submitting your CSR to a CA, you will receive your SSL certificate files, typically including a server certificate, a CA bundle, and possibly an intermediate certificate. Ensure that you keep these files secure and accessible. Download these certificate files to your server, usually in a specific directory like /etc/ssl/ or wherever your server hosts such files. The exact location can vary depending on the server type (Apache, Nginx, etc.).
The final step in the certificate installation process is pointing your web server configuration to these SSL certificate files. This involves editing your server’s configuration files (e.g., httpd.conf for Apache or nginx.conf for Nginx) to specify the location of the certificate file, the private key, and the CA bundle. After making these changes, you will need to restart your server to apply the new configuration and activate the SSL certificate.
Configuring Your Server for SSL Integration
Once your SSL certificate is installed, configuring your server to handle HTTPS requests can begin. First, ensure that your server is listening on port 443, the standard port for HTTPS traffic. This can usually be set in your server’s network settings or within its configuration file. Adjusting this setting is crucial for enabling secure communications through SSL/TLS.
Next, it’s important to configure server redirection from HTTP to HTTPS to ensure that all users are automatically redirected to the secure version of your site. This can typically be achieved by modifying the .htaccess file in your web directory or the respective server blocks in Nginx. By implementing this redirection, you help protect user data from being exposed over unsecured connections.
Finally, consider implementing security enhancements such as HSTS (HTTP Strict Transport Security) which instructs browsers to only use HTTPS when connecting to your server, thus preventing SSL stripping attacks. Additionally, regularly updating your SSL certificates and maintaining server software can help in bolstering your website’s security against new vulnerabilities.
Installing an SSL certificate on your website is a crucial step towards securing and encrypting the data exchanged between your visitors and your server. By following the step-by-step guide and ensuring proper server configuration for SSL integration, you not only protect sensitive information but also boost your website’s credibility and SEO rankings. Remember, the security landscape is continually evolving, so keep your systems updated and monitored to defend against potential threats. Secure your website today, and provide a safe environment for your users tomorrow.

