


How to Install a Web Application on a VPS
Installing a web application on a VPS gives you full control over your environment and can lead to better performance and customization. The following guide outlines the key steps to set up your VPS, install the necessary software, deploy your web application, and secure your server.
1. Prepare Your VPS
a. Choose and Set Up Your VPS
- Select a VPS Provider:
Choose a reliable VPS provider that meets your resource needs (CPU, RAM, storage, etc.). - Access Your VPS via SSH:
Use an SSH client to log in as the root user:ssh root@your-vps-ip - Update Your System:
Keep your server up-to-date by running:sudo apt update && sudo apt upgrade -y # For Ubuntu/Debian sudo yum update -y # For CentOS/AlmaLinux
2. Set Up Your Server Environment
a. Install a Web Server
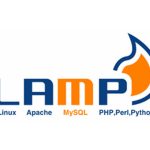
- LAMP (Linux, Apache, MySQL/MariaDB, PHP):
For Ubuntu/Debian:sudo apt install apache2 mysql-server php php-mysql -yFor CentOS/AlmaLinux:
sudo yum install httpd mariadb-server php php-mysql -y sudo systemctl start httpd && sudo systemctl enable httpd sudo systemctl start mariadb && sudo systemctl enable mariadb - LEMP (Linux, Nginx, MySQL/MariaDB, PHP):
Replace Apache with Nginx if preferred.
b. Install Additional Software
- Programming Languages/Frameworks:
If your web application requires specific languages or frameworks (e.g., Node.js, Python, Ruby), install the necessary runtime and package managers. - Database Setup:
Secure your database server and create a new database for your application. For example, using MySQL:mysql -u root -p CREATE DATABASE your_app_db; CREATE USER 'your_app_user'@'localhost' IDENTIFIED BY 'your_strong_password'; GRANT ALL ON your_app_db.* TO 'your_app_user'@'localhost'; FLUSH PRIVILEGES; EXIT;
3. Deploy Your Web Application
a. Upload Application Files
- Transfer Files:
Use SCP, SFTP, or Git to upload your web application code to your VPS. For example, with SCP:scp -r /path/to/your/app root@your-vps-ip:/var/www/your_app - Set File Permissions:
Ensure that your web server has access to your application files:sudo chown -R www-data:www-data /var/www/your_app # For Apache/Nginx on Ubuntu/Debian sudo chown -R apache:apache /var/www/your_app # For CentOS/AlmaLinux with Apache
b. Configure Application Settings
- Configuration Files:
Edit configuration files (e.g.,config.php,.env) to update database credentials, environment variables, and any other necessary settings.
4. Configure Your Web Server
a. Set Up Virtual Hosts (Apache) or Server Blocks (Nginx)
- For Apache (Virtual Hosts): Create a new configuration file, e.g.,
/etc/apache2/sites-available/your_app.conf:<VirtualHost *:80> ServerName yourdomain.com DocumentRoot /var/www/your_app <Directory /var/www/your_app> AllowOverride All Require all granted </Directory> ErrorLog ${APACHE_LOG_DIR}/your_app_error.log CustomLog ${APACHE_LOG_DIR}/your_app_access.log combined </VirtualHost>Enable the site and restart Apache:
sudo a2ensite your_app.conf sudo systemctl reload apache2 - For Nginx (Server Blocks): Create a configuration file in
/etc/nginx/sites-available/your_app:server { listen 80; server_name yourdomain.com; root /var/www/your_app; index index.php index.html index.htm; location / { try_files $uri $uri/ /index.php?$args; } location ~ \.php$ { include snippets/fastcgi-php.conf; fastcgi_pass unix:/var/run/php/php7.4-fpm.sock; # Adjust PHP version if needed } location ~ /\.ht { deny all; } }Enable the configuration and restart Nginx:
sudo ln -s /etc/nginx/sites-available/your_app /etc/nginx/sites-enabled/
sudo systemctl reload nginx
b. Update DNS Settings
- Point Your Domain:
Make sure your domain’s A record points to your VPS’s IP address. You can update this in your domain registrar’s DNS settings.
5. Test and Secure Your Application
- Test Your Site:
Visit your domain (e.g.,http://yourdomain.com) to verify that your application loads correctly. - Enable HTTPS:
Install an SSL certificate (using Let’s Encrypt or a commercial certificate) and configure your web server to redirect HTTP to HTTPS. - Security Measures:
Harden your server by setting up firewalls, regular backups, and monitoring tools to keep your application safe.
Final Thoughts
Installing a web application on a VPS involves setting up your server environment, deploying your application code, configuring your web server, and ensuring everything is secure and running efficiently. With proper planning and execution, you can enjoy the benefits of a scalable, customizable hosting solution tailored to your needs.
Ready to deploy your web application? Follow these steps to set up your VPS and get your application online!


