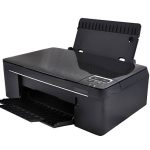


Printing directly from your smartphone or tablet is incredibly convenient. Here’s a step-by-step guide covering the most popular methods:
Method 1: Connecting via Your Printer’s Brand App (Most Common & Recommended)
Most modern printer manufacturers (like HP, Canon, Epson, Brother, Samsung, etc.) have their own dedicated mobile apps. These apps are often the easiest and most reliable way to connect and print, as they are custom-built for your specific printer model.
What you’ll need:
- Your smartphone (Android or iPhone).
- A Wi-Fi-enabled printer (most modern printers are).
- Your printer connected to your home/office Wi-Fi network (if applicable).
- The manufacturer’s app downloaded from your phone’s app store (e.g., HP Smart, Canon PRINT Inkjet/SELPHY, Epson iPrint, Brother Mobile Connect).
Steps:
- Download the App: Go to your phone’s app store (Google Play Store for Android, Apple App Store for iPhone) and search for your printer brand’s official printing app. Download and install it.
- Open the App & Add Printer: Launch the app. It will usually guide you through the setup process. This typically involves:
- Ensuring your printer is turned on.
- Making sure your phone is connected to the same Wi-Fi network as your printer.
- The app will then scan for your printer on the network.
- Once found, select your printer from the list and follow any on-screen prompts to complete the connection.
- Print! Once your printer is added to the app, you can usually:
- Browse photos, documents, or cloud storage directly from within the app.
- Use the “Share” or “Print” option from other apps (like your gallery, a web browser, or a document viewer) and select your printer’s app as the destination.
- Adjust settings like paper size, copies, and print quality before hitting print.
Method 2: Using Wi-Fi Direct (Direct Printer-to-Phone Connection)
Wi-Fi Direct allows your phone to connect directly to your printer without needing a Wi-Fi router or an internet connection. It’s like your printer creates its own mini-Wi-Fi hotspot. This is great for printing on the go or when you don’t have a shared network.
What you’ll need:
- Your smartphone.
- A Wi-Fi Direct-enabled printer (check your printer’s manual or control panel for this feature).
Steps:
- Enable Wi-Fi Direct on Your Printer: This step varies by printer model. Look for a Wi-Fi Direct button on the printer’s control panel, or navigate through its settings menu (e.g., Network Settings, Wi-Fi Direct Setup). Once enabled, the printer will display its Wi-Fi Direct name (SSID) and password.
- Connect Your Phone to the Printer’s Wi-Fi Direct Network:
- On your phone, go to Settings > Wi-Fi.
- Scan for available Wi-Fi networks. You should see a network name that includes “DIRECT” followed by your printer’s name or model number (e.g., “DIRECT-HP-DeskJet-2700”).
- Tap on this network and enter the password displayed on your printer’s control panel when prompted.
- Print Your Document:
- Once connected, open the document, photo, or webpage you want to print from your phone.
- Tap the “Share” icon (usually a square with an arrow pointing up on iPhone, or three dots/share symbol on Android) or find the “Print” option.
- Select the printer you just connected to from the list of available printers.
- Adjust print settings and tap “Print.”
- Disconnect (Optional): After printing, you might want to disconnect from the printer’s Wi-Fi Direct network and reconnect to your regular home Wi-Fi.
Method 3: Using Built-in Mobile Printing Services (AirPrint for iPhone, Default Print Service for Android)
Many modern phones have native printing capabilities that automatically detect compatible printers on the same Wi-Fi network.
For iPhone (AirPrint):
If you have an AirPrint-enabled printer, this is often the simplest method.
What you’ll need:
- Your iPhone (most modern iPhones support AirPrint).
- An AirPrint-enabled printer (check your printer’s specifications).
- Both your iPhone and printer connected to the same Wi-Fi network.
Steps:
- Open the App: Open the app you want to print from (e.g., Photos, Mail, Safari, Pages).
- Find the Print Option: Tap the “Share” icon (a square with an upward arrow). Scroll down and tap “Print.”
- Select Your Printer: Tap “No Printer Selected” and choose your AirPrint-enabled printer from the list that appears.
- Adjust & Print: Choose the number of copies and any other options. Tap “Print” in the upper-right corner.
For Android (Default Print Service / Mopria Print Service):
Android devices often use a “Default Print Service” or “Mopria Print Service” that works with a wide range of printers.
What you’ll need:
- Your Android smartphone.
- A Mopria-compatible or network-enabled printer.
- Both your phone and printer connected to the same Wi-Fi network.
Steps:
- Enable Print Service (if not already):
- Go to your phone’s Settings.
- Search for “Printing” or “Connection preferences” > “Printing.”
- Ensure “Default Print Service” (or “Mopria Print Service,” which is often pre-installed) is turned on. You might need to add a service for your specific printer brand if it’s not automatically detected (e.g., by tapping “Add service” and installing the relevant plugin).
- Open the Document: Open the document, photo, or webpage you want to print.
- Initiate Print: Look for a “Print” option, often found under a “Share” icon or a three-dot menu.
- Select Printer: Your phone should automatically detect compatible printers on the same network. Select yours from the list.
- Adjust & Print: Adjust print settings (copies, pages, etc.) and tap “Print.”
Method 4: Using a USB OTG Cable (for Android & Specific Printers)
For older printers without Wi-Fi, or if you prefer a wired connection, some Android phones can connect via a USB On-The-Go (OTG) cable.
What you’ll need:
- An Android smartphone that supports USB OTG (most modern ones do).
- A printer with a USB Type B port (the square-ish one, usually used for connecting to computers).
- A USB OTG adapter/cable (USB-C or Micro-USB on one end to USB-A on the other end, where you plug in the printer’s USB cable).
- A third-party printing app like PrinterShare or NokoPrint (often required for drivers).
Steps:
- Get the Right Cables: Connect the printer’s USB cable (USB-A to USB-B) to the USB-A port on your OTG adapter. Then, plug the OTG adapter into your phone’s charging port.
- Install a Printing App: Download a third-party app like PrinterShare or NokoPrint from the Google Play Store. These apps often contain universal drivers for various printers.
- Open the App & Select Printer: Launch the app. It will usually detect the connected USB printer. Follow the in-app instructions to select your printer and, if prompted, download any necessary drivers.
- Print! Once the printer is recognized, you can print directly from the app.
Troubleshooting Tips:
- Ensure Power: Make sure your printer is turned on and has paper and ink/toner.
- Same Wi-Fi Network: For most wireless methods, ensure both your phone and printer are connected to the same Wi-Fi network.
- Restart Everything: Sometimes, simply turning off and on your phone, printer, and Wi-Fi router can resolve connection issues.
- Update Apps/Drivers: Ensure your printer’s app and your phone’s operating system are up to date.
- Check Printer Manual: When in doubt, your printer’s manual is your best friend for specific setup instructions.
Connecting your printer to your phone eliminates the need for a bulky computer, streamlining your workflow and making printing tasks quicker and more convenient. With these methods, your smartphone truly becomes an all-in-one digital hub, capable of much more than just calls and messages.


