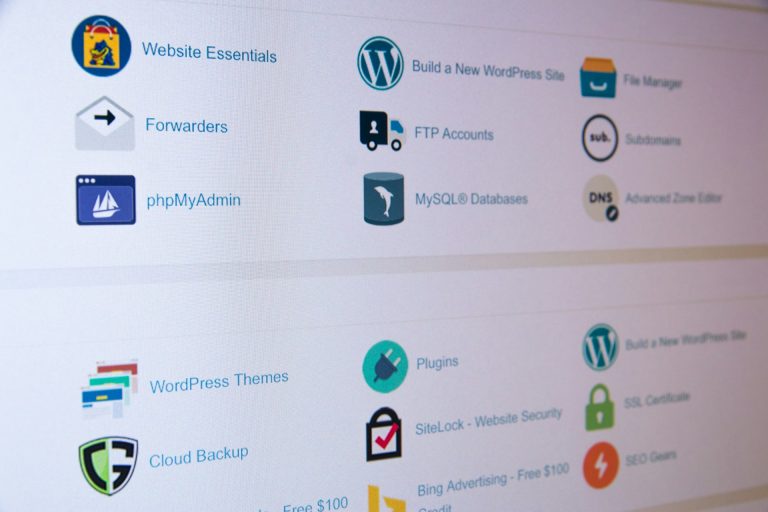
Home Blog Page 434

Why Tremhost’s cPanel Web Hosting is the Best Choice for Your Website

0

When it comes to web hosting, having a reliable, secure, and high-performing service provider is non-negotiable. Tremhost not only delivers all of this but goes beyond expectations with its affordable plans, exceptional features, and lifetime hosting options. Whether you’re a small business, a blogger, or a growing enterprise, Tremhost’s cPanel hosting plans are designed to meet your exact needs without breaking the bank.

Let’s take a closer look at why Tremhost is the perfect choice for cPanel web hosting.

Affordable Plans Starting at Just $3.00/Month

Budget-conscious website owners will love Tremhost’s competitive pricing. Starting at just $3.00/month, Tremhost offers an affordable entry point for anyone seeking high-quality hosting. With multiple plans to choose from, you can scale as your website grows, ensuring that you never pay for more than what you need.

Compare Tremhost’s Hosting Plans:

Plan Name Price SSD Storage MySQL Databases Bandwidth Key Features
Himalaya Plan $3.00/month 20 GB 3 20 GB/month Free SSL, cPanel, NVMe SSD storage
Bvumba Plan $5.00/month 50 GB 5 50 GB/month Free SSL, cPanel, NVMe SSD storage
Chimanimani Plan $8.00/month 100 GB 10 100 GB/month Free SSL, cPanel, NVMe SSD storage
Nyangani Plan $10.00/month 250 GB 50 1 TB/month Free SSL, cPanel, NVMe SSD storage
The Big Mike $25.00/month 500 GB 500 2 TB/month Free SSL, cPanel, NVMe SSD storage, advanced security features

With plans like these, Tremhost offers more storage, bandwidth, and value compared to competitors like HostGator, Hostinger, or GoDaddy.

Why Choose Tremhost’s cPanel Hosting?

Tremhost offers everything you need for a smooth website hosting experience. From the industry-standard cPanel control panel to exceptional performance and security features, Tremhost makes hosting easier and more effective.

Here’s what you get with Tremhost’s cPanel hosting:

1. Secure and Scalable Hosting

  • Free SSL Certificates for all plans (worth $20) ensure that your website is secure and trusted by browsers.
  • Hosting plans are scalable, so you can upgrade seamlessly as your website grows.
  • DDoS Protection keeps your website safe from malicious attacks.

2. Faster Loading Speeds

Tremhost uses NVMe SSD storage, which is significantly faster than traditional HDDs. Unlike competitors, Tremhost doesn’t overpack servers with too many clients, ensuring better performance, faster loading times, and server integrity.

3. High Reliability with 99.9% Uptime Guarantee

Tremhost guarantees 99.9% uptime, so your website is always available to visitors. With multiple data center locations, redundant cooling, and emergency generators, Tremhost ensures uninterrupted service.

4. Around-the-Clock Support

Tremhost’s 24/7 support team is always ready to assist, no matter how small your issue. Whether you’re new to hosting or a seasoned pro, Tremhost’s team of experts provides timely and effective solutions.

5. User-Friendly cPanel

Manage your website effortlessly with the cPanel control panel. From file management to database creation and email setup, cPanel makes hosting intuitive and simple.

6. Automatic SSL Installation

SSL certificates are installed automatically, saving you the hassle of manual configuration. This feature ensures that your website is secure right from the start.

Lifetime Web Hosting: A Unique Offering

Tremhost goes above and beyond by offering lifetime web hosting plans, which eliminate the need for monthly or yearly renewals. For a one-time payment, you can host your website forever.

Lifetime Hosting Plans Overview:

Plan Name Price (One-Time) SSD Storage Bandwidth Features
Cheap Plan $180 2 GB 3 GB/month cPanel, Softaculous, SitePad Builder, LiteSpeed, WordPress Support
Starter Plan $300 5 GB 5 GB/month cPanel, Softaculous, SitePad Builder, LiteSpeed, WordPress Support
Pro Plan (Popular) $350 10 GB 10 GB/month cPanel, Softaculous, SitePad Builder, LiteSpeed, WordPress Support

This is perfect for users who want cost-effective, long-term hosting without worrying about recurring fees. Lifetime hosting is an excellent offering that sets Tremhost apart from competitors like HostGator and Hostinger, who do not offer such plans.

Additional Features Across All Plans

Tremhost ensures that all hosting plans come with these standard features to give you peace of mind and a smooth experience:

  • Access Management: Easily manage your hosting account and collaborate with your team.
  • PHP Version Control: Optimize your site’s performance by selecting the PHP version that works best for your application.
  • eCommerce Optimization: Perfect for online stores with features like free SSL and fast loading times.
  • Free Migration: Switching from another host? Tremhost will transfer your website for free.
  • File Manager: Manage your website files directly through cPanel.
  • LiteSpeed WordPress Hosting: Enjoy faster WordPress performance with LiteSpeed servers.

Why Tremhost Outshines Competitors

1. Transparent Pricing

Unlike HostGator and Hostinger, Tremhost offers straightforward pricing with no hidden fees or sudden price hikes upon renewal. What you see is truly what you pay.

2. Packed with Features

Tremhost includes features like daily backups, free SSL, and cPanel access in all plans, whereas competitors often charge extra for these essentials.

3. Lifetime Hosting

Tremhost’s lifetime hosting plans are a game-changer for budget-conscious users, saving thousands of dollars over time.

4. Superior Performance

Tremhost’s focus on faster loading speeds, NVMe SSD storage, and uncluttered servers ensures that your website always performs at its best.

5. Outstanding Support

Tremhost’s 24/7 support team is made up of real people—tech veterans who go above and beyond to resolve your issues quickly and effectively.

Conclusion: Tremhost is the Obvious Choice

Whether you’re starting a personal blog, running an online store, or managing a large business website, Tremhost delivers unmatched value, performance, and reliability. With plans starting at just $3.00/month and unique offerings like lifetime hosting, Tremhost is the best alternative to overpriced and overhyped competitors like HostGator, Hostinger, and GoDaddy.

If you’re ready to experience secure, scalable, and high-performance hosting, it’s time to switch to Tremhost. You’ll enjoy unparalleled peace of mind knowing that your website is in the hands of a reliable and customer-focused hosting provider.

Get started with Tremhost today and take your website to the next level!
Choose Your Hosting Plan Now

How to Move from Wix to Your Own Web Hosting (2025 Guide)

0

Moving from a platform like Wix to your own web hosting involves several steps, as you’ll be transitioning from a proprietary platform to a more open and customizable hosting environment. Here’s a comprehensive guide to help you make the switch in 2025:

Step 1: Choose Your Web Hosting Provider

  • Select a Hosting Plan: Depending on your website’s needs (e.g., traffic, storage, scalability), choose between shared, VPS, or dedicated hosting.
  • Purchase a Domain: If you don’t already own a domain name separate from Wix, you’ll need to register one. Some hosting providers offer a free domain name as part of their hosting packages.

Step 2: Prepare for Migration

  • Content Backup: Wix does not allow you to directly export your data (like your site’s HTML and CSS files), so you will need to manually save or recreate your content.
    • Copy Text Content: Copy your text content into document files.
    • Download Images and Videos: Save all media files used on your Wix site to your computer.
    • Record Design Elements: Note down any specific design elements or layouts that you want to replicate on your new site.

Step 3: Set Up the New Hosting Environment

  • Install a CMS: Most websites not built from scratch use a CMS like WordPress, which you can often install directly from your hosting control panel via tools like Softaculous.
  • Customize Settings: Configure basic settings, such as time zone, user permissions, and website structure.

Step 4: Website Design and Development

  • Choose a Theme: Select a theme that matches or complements your previous Wix design. Many CMS platforms have extensive theme libraries.
  • Customize the Design: Adjust your chosen theme to match your brand’s look and feel. This might involve tweaking colors, fonts, and layout.
  • Recreate Pages: Rebuild your pages using the CMS editor, based on the layout and content you had on Wix.
  • Re-upload Media: Upload the images and videos you saved from your Wix site to your new hosting environment.

Step 5: Reimplement Functionality

  • Add Plugins or Extensions: To add functionalities similar to what you had on Wix (like contact forms, SEO tools, or e-commerce capabilities), install necessary plugins or extensions.
  • Configure SEO: Set up SEO-friendly URLs, meta tags, and sitemaps. Ensure that you maintain any SEO gains by implementing redirects if your URL structures have changed.

Step 6: Test Your New Website

  • Functionality Testing: Check all interactive elements like forms and buttons.
  • Performance Testing: Ensure the site loads efficiently and performs well under different conditions.
  • Responsiveness Check: Verify that your website is responsive and looks good on all devices.

Step 7: Point Your Domain to the New Host

  • Update DNS Settings: Change the DNS settings to point to your new web hosting provider. This is typically done by updating the nameserver records with your domain registrar.

Step 8: Go Live and Monitor

  • Launch Your Website: Once everything is set up and tested, officially launch your new website.
  • Monitor Traffic and Functionality: Keep an eye on website traffic and functionality. Tools like Google Analytics and uptime monitors can help track performance and alert you to issues.

Step 9: Cancel Wix (Optional)

  • Close Your Wix Account: If you are sure you no longer need your old Wix website, remember to cancel your subscription to avoid continued billing.

Additional Tips

  • Legal and Compliance: Make sure your new website complies with any relevant laws and regulations, particularly in terms of data protection and privacy.
  • Backup Regularly: Establish a routine backup schedule with your new hosting provider to secure your data.

Moving from Wix to your own web hosting allows for greater control and customization of your web presence. By carefully planning the migration and setting up a robust new environment, you can ensure a smooth transition with minimal disruption to your online presence.

How to Create Subdomains and Parked Domains in cPanel

0

Creating subdomains and parked domains in cPanel is a straightforward process that can help expand your website’s reach and streamline its structure. Here’s a step-by-step guide to setting up both types of domains through cPanel.

Creating Subdomains in cPanel

Subdomains allow you to create separate sections of your website with a unique prefix, like blog.yoursite.com or shop.yoursite.com. Here’s how to create them:

  1. Log into cPanel: Access your cPanel dashboard using your username and password.

  2. Find the Subdomains Option:

    • Scroll down to the “Domains” section and click on “Subdomains.”
  3. Create a New Subdomain:

    • Subdomain: Enter the prefix you want for your subdomain (e.g., blog, shop).
    • Domain: Select the domain under which you want to create the subdomain from the dropdown menu.
    • Document Root: By default, cPanel will suggest a document root path based on the subdomain name, like /public_html/blog. You can adjust this if needed.
    • Click the “Create” button.
  4. Access and Develop Your Subdomain:

    • After creation, you can access the subdomain as a separate website. You can upload files, install applications, or redirect it to another site.

Creating Parked Domains (Domain Aliases) in cPanel

Parked domains, also known as domain aliases, allow you to point multiple domain names to the same website. For example, if you own yoursite.net and yoursite.org, you can have them both show the same content as yoursite.com.

  1. Log into cPanel: Enter your credentials to access your dashboard.

  2. Navigate to Parked Domains:

    • Find the “Domains” section and click on “Aliases.”
  3. Add a New Parked Domain:

    • In the “Create a New Alias” area, enter the domain name you wish to park.
    • Click the “Add Domain” button.
  4. Configure Redirection (Optional):

    • After adding the domain alias, you might want to manage redirection. Go back to the “Aliases” section.
    • Find the newly created parked domain and click on “Manage Redirection.”
    • Enter the URL where you want to redirect the parked domain and click “Save.”
  5. DNS Settings:

    • Ensure that the DNS settings for your parked domain are configured to point to the same DNS as your main domain, typically involving setting the nameservers to those provided by your hosting company.

Things to Consider

  • DNS Propagation: Changes to DNS settings, such as adding subdomains or parked domains, can take up to 48 hours to fully propagate across the internet.
  • SSL Certificates: If you are using SSL certificates, ensure they cover your new subdomains or parked domains. You might need a wildcard SSL for subdomains or additional SSL certificates for new domain aliases.
  • File Management: For subdomains, you’ll manage files within their respective document roots, which helps keep different sections of your website organized.

By following these steps, you can effectively utilize subdomains to organize your site and parked domains to expand your site’s reach. Both features are integral parts of domain management in cPanel, allowing for flexibility in how you deploy and manage content across your web presence.

How to Build a Website Using cPanel (Softaculous Tutorial)

0

Building a website using cPanel and Softaculous is a streamlined process that simplifies the installation of various web applications, including popular content management systems (CMS) like WordPress, Joomla, and Drupal. Softaculous automates the installation procedures, making it easy for users without extensive technical knowledge. Here’s a detailed guide on how to build a website using cPanel and Softaculous:

Step 1: Access Your cPanel Account

  • Log In: Access your cPanel account by entering the URL provided by your hosting provider, which usually looks something like http://yourdomain.com/cpanel. Use your username and password to log in.

Step 2: Navigate to Softaculous Apps Installer

  • Find Softaculous: Once logged into cPanel, scroll down to the “Software” section or use the search feature to find the “Softaculous Apps Installer” icon. Click on it to open the Softaculous dashboard.

Step 3: Choose Your Application

  • Select an Application: Softaculous provides a wide array of applications organized by categories such as blogs, forums, CMS, and e-commerce. For a typical website, you might select WordPress, which is under the “Blogs” category.
  • View Details: Click on the application icon (e.g., WordPress) to view details about the application, including features, ratings, and reviews.

Step 4: Install the Application

  • Install: On the application’s overview page, click the “Install” button. This will bring you to the setup page.
  • Setup Details:
    • Choose Protocol: If you have SSL installed (highly recommended), choose https:// or https://www. Otherwise, choose http:// or http://www.
    • Choose Domain: Select the domain under which you want to install the application.
    • In Directory: If you want the application to be the main site, ensure this field is blank. To install it in a subfolder, type the folder name here.
    • Site Settings: Enter your site name and site description.
    • Admin Account: Create an administrator username, password, and admin email. This account will be used to manage your website.

Step 5: Advanced Options

  • Database Name: Softaculous will create a database with a default name, but you can change it to something more recognizable if you prefer.
  • Table Prefix: Change the database table prefix for security reasons, especially for WordPress installations.
  • Backups: Decide on the backup frequency and rotation to ensure that you have a recent backup of your site.

Step 6: Review and Install

  • Review: Double-check all settings. You can also choose to receive installation details via email by entering your email address in the provided field.
  • Install: Click the “Install” button. Softaculous will proceed with the installation, and within a few minutes, you should receive confirmation that the installation was successful.

Step 7: Customize Your Website

  • Access Your New Site: Use the administrative URL provided by Softaculous to access the backend of your new website.
  • Customize: Start customizing your website by selecting themes, installing plugins, and adding content through the CMS dashboard.

Step 8: Monitor and Maintain

  • Regular Updates: Regularly update your CMS, themes, and plugins to maintain security and functionality.
  • Backup: Ensure regular backups are done to prevent data loss.

Using Softaculous in cPanel for website building not only simplifies the installation process but also provides tools for managing applications efficiently. This setup is ideal for users looking for a quick and easy way to launch and manage websites without diving deep into manual setup and configuration.

How to Install a LAMP Stack on Your VPS (2025 Guide)

0

How to Install a LAMP Stack on Your VPS (2025 Guide)

A LAMP stack is a group of open-source software typically used to get web servers up and running. The acronym stands for Linux, Apache, MySQL, and PHP. Here is a step-by-step guide to installing a LAMP stack on your Virtual Private Server (VPS) as of 2025:

Step 1: Access Your VPS

  • SSH into Your VPS: Use an SSH client to connect to your VPS. You will need your server’s IP address, SSH port, and root credentials.
    ssh root@your_server_ip
    

Step 2: Update Your System

  • Update Package Lists: Before installing any software, it’s a good practice to update your package lists.
    sudo apt update
    
  • Upgrade Packages: Optionally, you can upgrade all your system software to the latest versions.
    sudo apt upgrade
    

Step 3: Install Apache

  • Install Apache2: Apache is the most widely used web server software.
    sudo apt install apache2
    
  • Adjust Firewall: Ensure that your firewall allows HTTP and HTTPS traffic.
    sudo ufw allow in "Apache Full"
    

Step 4: Install MySQL (MariaDB)

  • Install MySQL: As of 2025, MariaDB is often preferred over MySQL due to its open-source nature, but both function similarly.
    sudo apt install mariadb-server
    
  • Secure MySQL: Run the mysql_secure_installation script to secure your database server.
    sudo mysql_secure_installation
    

    Follow the prompts to set a root password, remove anonymous users, restrict root user access to the local machine, and remove the test database.

Step 5: Install PHP

  • Install PHP: PHP is a server-side scripting language designed for web development.
    sudo apt install php libapache2-mod-php php-mysql
    
  • PHP Modules: Install additional PHP modules based on your needs.
    sudo apt install php-cli php-fpm php-json php-common php-mysql php-zip php-gd php-mbstring php-curl php-xml php-pear php-bcmath
    

Step 6: Test Apache

  • Check Apache: Ensure Apache is running.
    sudo systemctl status apache2
    
  • Access Default Page: Open your web browser and navigate to http://your_server_ip/. You should see the default Apache2 Ubuntu Default Page.

Step 7: Test PHP

  • Create PHP File: Create a simple PHP file to test PHP processing on your Apache server.
    echo "" | sudo tee /var/www/html/info.php
    
  • Access PHP Page: In your web browser, go to http://your_server_ip/info.php. You should see a page displaying information about your PHP configuration.

Step 8: Configure MySQL (MariaDB)

  • Login to MySQL: Log into the MySQL shell.
    sudo mysql
    
  • Create Database and User: Optionally, you can create a database and a user for your applications.
    CREATE DATABASE exampledb;
    CREATE USER 'exampleuser'@'localhost' IDENTIFIED BY 'password';
    GRANT ALL PRIVILEGES ON exampledb.* TO 'exampleuser'@'localhost';
    FLUSH PRIVILEGES;
    EXIT;
    

Step 9: Secure Your System

  • Regular Updates: Keep your system secure by regularly updating all software.
  • Backup Configurations: Regularly back up your configurations and databases.

Step 10: Additional Configurations

  • Tune Apache and PHP: Adjust configurations in Apache and PHP to optimize performance and security based on your specific needs.

Installing a LAMP stack on your VPS equips you with the essential software needed to host dynamic websites and web applications. This setup forms the backbone for many popular CMSes like WordPress, Drupal, and Joomla, and is known for its robustness, flexibility, and customization capabilities.

How to Monitor Your Website’s Uptime (Cheap & Easy Methods)

0

Monitoring your website’s uptime is crucial to ensure that your site is consistently accessible to users. It helps in identifying downtime issues, which can significantly impact user experience and SEO rankings. Here are some cheap and easy methods to monitor your website’s uptime effectively:

1. Use Free Uptime Monitoring Tools

Several online services offer free uptime monitoring and alert you via email or other methods if your website goes down. Here are a few popular ones:

  • UptimeRobot: Offers a free plan that includes 5-minute monitoring intervals for up to 50 monitors.
  • StatusCake: Provides a free plan with 5-minute checks and alerts via email.
  • Freshping by Freshworks: Allows you to monitor 50 websites at 1-minute intervals for free.

2. Set Up Google Analytics Alerts

Google Analytics can’t monitor your server’s uptime directly, but it can alert you to sharp declines in traffic, which might be indicative of downtime.

  • Create a Custom Alert: In Google Analytics, go to Admin > View > Custom Alerts. Set up an alert to notify you when daily sessions fall below a certain threshold that you consider normal.

3. Utilize Website Hosting Provider Tools

Some web hosting providers offer built-in monitoring tools that can alert you to issues with your site, including uptime problems.

  • Check Hosting Account: Log into your hosting control panel to see if they offer uptime monitoring as part of their service package.
  • Enable Notifications: If available, enable these notifications so you can be alerted of any downtime or performance issues immediately.

4. Employ Simple DIY Scripts

If you’re technically inclined, you can set up a basic script to ping your website at regular intervals and email you if it fails to respond.

  • Cron Job: Set up a cron job on a separate server to periodically make an HTTP request to your website. If it fails or returns an unexpected response, the script can trigger an alert to your email.
  • Python or PHP Scripts: Write a simple script in Python or PHP that checks the HTTP status code of your website. Schedule this script to run at regular intervals via a cron job.

5. Use Cloud-Based Monitoring Services

Cloud services like AWS CloudWatch or Microsoft Azure Monitor provide capabilities for monitoring web applications and can send alerts when your website is down.

  • AWS CloudWatch: Can monitor AWS resources like EC2 instances and trigger notifications through Amazon SNS when your website is unreachable.
  • Azure Monitor: Offers detailed performance and uptime monitoring for websites hosted on Azure, with alerts via email or SMS.

6. Integrate with Slack or Other Communication Tools

Some monitoring services offer integration with Slack, Microsoft Teams, or other communication tools, enabling real-time alerts to be sent directly to your team’s communication channels.

  • Integration Options: Check if the monitoring tool you choose supports integration with your team communication platform to streamline alerts.

7. Regularly Review Logs and Reports

  • Analytical Review: Most uptime monitoring tools provide detailed logs and reports. Regularly review these to identify any patterns or recurring downtime issues.
  • Take Proactive Steps: Use the insights gained from logs to address and mitigate underlying causes of downtime.

By implementing these methods, you can ensure robust monitoring of your website’s uptime without incurring significant costs. This proactive approach allows you to quickly respond to downtime, minimizing its impact on your users and your business’s reputation.

How to Troubleshoot DNS Issues with Your Web Hosting

0

DNS (Domain Name System) issues can cause your website to become inaccessible or not function as expected. Troubleshooting DNS problems is crucial for ensuring your website remains online and available to your users. Here are steps to diagnose and resolve common DNS issues related to web hosting:

1. Verify Domain Registration

  • Check Domain Status: Ensure that your domain is registered and has not expired. You can use tools like WHOIS to check the registration status of your domain.

2. Confirm DNS Configuration

  • Nameserver Settings: Check that your domain’s nameserver settings are correctly pointed to your hosting provider’s nameservers. This information is typically available in your domain registrar’s control panel.
  • DNS Records: Log into your hosting control panel or DNS management tool and verify that all DNS records are correctly set up. Key records to check include:
    • A Record: Points your domain to the IP address of your hosting server.
    • CNAME Record: Used for subdomains and should point to your main domain name.
    • MX Records: Ensures that emails are correctly routed to your mail servers.
    • TXT Records: Often used for verification processes and email spam prevention.

3. Check for DNS Propagation

  • Propagation Time: After making changes to your DNS records, it can take anywhere from a few minutes to 48 hours for changes to propagate worldwide. Use online tools like WhatsmyDNS.net to check the propagation status of your DNS records globally.
  • Flush DNS Cache: Sometimes, old DNS information can be cached on your local machine or network. You can flush your DNS cache by running ipconfig /flushdns on Windows or dscacheutil -flushcache on macOS in the command line.

4. Use Diagnostic Tools

  • Ping and Traceroute: Use ping to check connectivity to your server’s IP address and traceroute to determine the path data takes to reach the server. These tools can help identify connectivity issues or delays.
  • DNS Checkers: Tools like MXToolbox can help you diagnose DNS configurations and record issues, providing insights into what may be misconfigured or causing problems.

5. Examine TTL Values

  • TTL Settings: Review the TTL (Time to Live) settings for your DNS records. If TTL values are set very high, it might take longer for DNS changes to propagate. Consider lowering TTL temporarily before making further DNS changes to speed up propagation.

6. Check for DNS Server Issues

  • Hosting Provider’s DNS: Occasionally, the issue might be with your hosting provider’s DNS servers. Check your hosting provider’s status page or contact their support to determine if there is a known issue with their DNS services.

7. Test with Different Networks

  • Different ISP: DNS issues can sometimes be related to a specific Internet Service Provider (ISP). Try accessing your site from a different network (e.g., using mobile data instead of your home WiFi) to see if the issue persists across different networks.

8. Contact Support

  • Reach Out for Help: If after these steps, you still face DNS issues, contact your web hosting provider or a network specialist for further assistance. Provide them with all relevant information and any findings from your troubleshooting steps.

9. Document and Monitor

  • Keep Records: Document any changes you make to DNS settings and the outcomes of your troubleshooting efforts. This can be helpful for future reference or if additional support is needed.
  • Ongoing Monitoring: Consider setting up DNS monitoring tools to alert you to future DNS failures or unusual activities.

By methodically following these steps, you can diagnose and likely resolve most DNS issues related to your web hosting, ensuring your website’s accessibility and performance are maintained.

How to Set Up Email Accounts on Your cPanel VPS

0

Setting up email accounts on your cPanel VPS is a straightforward process that can help you manage communications efficiently. Here’s a step-by-step guide on how to configure email accounts via cPanel on your Virtual Private Server (VPS):

Step 1: Log into cPanel

First, access your cPanel dashboard. You typically do this by visiting http://yourdomain.com/cpanel or http://yourIPaddress:2083, and then enter your username and password.

Step 2: Navigate to the Email Section

Once you’re logged into cPanel, look for the “Email” section. This section contains various options related to email management.

Step 3: Create a New Email Account

  • Access Email Accounts: Click on the “Email Accounts” icon within the Email section. This will take you to a page where you can manage all email accounts associated with your domains.
  • Add Email Account: You will see an option to “Create” or “Add Email Account.” Click this button to start setting up a new email account.
  • Fill in the Details:
    • Email: Enter the desired email username and select the domain from the dropdown menu if you have multiple domains.
    • Password: Create a strong password or use the “Generate” button to create one automatically. Ensure you save this password in a secure location.
    • Mailbox Quota: Set the quota for the mailbox if you want to limit the amount of disk space the email can use. Alternatively, you can select “Unlimited” if you do not wish to impose any limits.

Step 4: Configure Email Client

After creating the email account, you might want to set it up in an email client such as Microsoft Outlook, Apple Mail, or Mozilla Thunderbird.

  • Access Email Configuration: Go back to the “Email Accounts” page, find the newly created email account, and click on “Connect Devices” or “Set Up Mail Client” next to the account.
  • Choose Protocol: Select the protocol you wish to use (IMAP is recommended as it syncs the email across all devices and keeps the mail on the server).
  • Manual Settings: The page will provide you with manual settings including incoming and outgoing server names, port numbers, and encryption methods. Use these details to configure your email client manually.

Step 5: Test the Email Account

  • Send a Test Email: From your new email account, send a test email to another email address to ensure it is sending emails correctly.
  • Receive a Test Email: Send an email from a different email address to your new account to check its receiving capability.

Step 6: Manage Spam Filters

cPanel provides options like “Spam Filters” and “Email Filters” where you can manage settings to handle unwanted emails effectively.

  • Spam Filters: Navigate to this section to enable or configure Apache SpamAssassin, a mail filter to identify spam.
  • Email Filters: Set up rules to automatically manage incoming mail based on your preferences.

Step 7: Additional Features

Explore other email features in cPanel such as:

  • Email Forwarders: Set up forwarding rules to send copies of incoming emails to another address.
  • Autoresponders: Configure auto-reply messages for incoming emails, useful for notifying senders when you are away or unavailable.

By following these steps, you can effectively set up and manage email accounts on your cPanel VPS, enhancing your business’s communication capabilities with a professional touch. Make sure to regularly maintain and monitor your email settings to adapt to any changes in your communication needs.

How to Install a Free SSL Certificate on cPanel (Let’s Encrypt Guide)

0

How to Install a Free SSL Certificate on cPanel Using Let’s Encrypt

Installing a free SSL certificate from Let’s Encrypt on a cPanel-managed hosting can significantly enhance your website’s security by encrypting data transferred between your server and your visitors. Here’s a step-by-step guide on how to set this up:

1. Check for AutoSSL

Before manually installing Let’s Encrypt, check if your hosting provider offers AutoSSL (cPanel’s built-in SSL management feature) which automatically installs and renews Let’s Encrypt SSL certificates for all domains configured in your account.

  • Log into cPanel: Access your hosting dashboard.
  • Find the ‘SSL/TLS Status’: This tool is often found under the ‘Security’ section.
  • Check AutoSSL: If enabled, your domains should be covered automatically. If not, or if you prefer to use Let’s Encrypt directly, proceed with the following steps.

2. Enable Let’s Encrypt with AutoSSL

If your host supports AutoSSL but hasn’t enabled Let’s Encrypt:

  • Access WHM (Web Host Manager): You’ll need root access to WHM to change this setting.
  • Navigate to ‘Manage AutoSSL’: Usually found under the ‘SSL/TLS’ section.
  • Select Provider: Choose ‘Let’s Encrypt’ as the provider and agree to the terms of service.
  • Enable AutoSSL: Apply AutoSSL to your domains. WHM will automatically install and periodically renew the SSL certificates.

3. Manual Installation of Let’s Encrypt

If AutoSSL isn’t available or you prefer a more manual approach:

  • Access SSH: Connect to your server via SSH.
  • Install Certbot: Certbot is a Let’s Encrypt client that simplifies the process of obtaining and installing SSL certificates. Install Certbot by running:
    sudo yum install certbot python2-certbot-apache  # For CentOS/RHEL
    sudo apt-get install certbot python-certbot-apache  # For Debian/Ubuntu
    
  • Generate Certificate: Execute Certbot to generate the SSL certificate:
    sudo certbot --apache -d yourdomain.com -d www.yourdomain.com
    

    Replace yourdomain.com with your actual domain name.

4. Manual Configuration in cPanel

If you installed the SSL certificate via Certbot without cPanel/WHM integration:

  • Log into cPanel: Go to the SSL/TLS manager.
  • Install and Manage SSL: Find the section to manage SSL sites.
  • Install SSL Certificate: Copy and paste the certificate (CRT), private key (KEY), and CA bundle (CABUNDLE) into the appropriate fields for your domain. These files are typically located in /etc/letsencrypt/live/yourdomain.com/.

5. Verify Installation

  • SSL Check: Use an online tool like SSL Labs’ SSL Test to check if the SSL certificate is installed correctly and functioning as expected.
  • Browser Padlock: Visit your website and ensure that browsers show a secure padlock icon, indicating that SSL is working properly.

6. Setup Automatic Renewal

Let’s Encrypt certificates are valid for 90 days, so setting up automatic renewal is crucial:

  • Cron Job for Renewal: Add a cron job to run the renewal command periodically:
    0 2 * * * /usr/bin/certbot renew --quiet
    

    This command attempts to renew any expiring certificates at 2:00 AM daily.

By following these steps, you can successfully install a free SSL certificate from Let’s Encrypt on your cPanel server, enhancing your website’s security and trustworthiness without incurring additional costs.

How to Build a Scalable Hosting Environment on a Budget VPS

0

Creating a scalable hosting environment on a budget Virtual Private Server (VPS) involves careful planning, optimization, and leveraging the right technologies. Here’s how to achieve scalability without breaking the bank:

1. Choose the Right VPS Provider

  • Resource Scalability: Opt for a VPS provider that offers easy scalability options. This allows you to increase CPU, RAM, and storage resources as your needs grow without migrating to a new server.
  • Cost-Effectiveness: Compare different providers and plans to find one that offers the best balance between cost, performance, and scalability. Consider providers that offer burstable resources during traffic spikes.

2. Optimize Server Configuration

  • Operating System: Choose a lightweight operating system, such as Ubuntu Server or CentOS, which can be stripped down to the essentials to save on system resources.
  • Web Server Software: Use efficient web server software. For instance, Nginx is known for its performance and low resource consumption compared to Apache, especially under scale.

3. Implement Advanced Caching Mechanisms

  • Content Delivery Network (CDN): Implement a CDN to offload the delivery of static resources like images, CSS, and JavaScript files. This reduces the load on your VPS and improves user experience by decreasing load times.
  • Caching Tools: Use caching tools like Varnish for HTTP caching and Redis or Memcached for object and database caching. These tools can significantly improve the response time and reduce the load on the server.

4. Utilize Cloud and Hybrid Solutions

  • Hybrid Hosting: Consider a hybrid approach where critical components run on the VPS, and additional scalable resources like storage or databases are handled by cloud services. This can be cost-effective and allow you to scale specific aspects of your hosting environment.
  • Microservices Architecture: Where possible, use a microservices architecture to decentralize services and applications. This allows you to scale individual components independently in the cloud, reducing the load on your VPS.

5. Database Optimization

  • Database Management: Regularly optimize your database by performing tasks like indexing, regular clean-ups of old data, and using efficient queries. Consider using a separate database server if your database load becomes too high for a single server setup.
  • Replication and Load Balancing: Implement database replication and load balancing to distribute the load across multiple servers or services, improving performance and redundancy.

6. Automate Monitoring and Scaling

  • Monitoring Tools: Use tools like Nagios, Zabbix, or Prometheus to monitor your server’s performance and resource utilization continuously.
  • Auto-Scaling: Set up scripts or use third-party services that can automatically add resources or optimize configurations based on traffic and load metrics.

7. Regular Performance Testing

  • Stress Testing: Regularly perform stress tests and load testing to identify potential bottlenecks and performance issues as you scale. This helps you understand how your server handles increased loads.
  • Performance Tuning: Based on testing results, continually tune and optimize your server settings, code, and configurations to handle greater loads effectively.

8. Leverage Virtualization Technologies

  • Containers: Use containerization technologies like Docker for deploying applications. Containers consume fewer resources than traditional virtual machines and allow for rapid provisioning and scaling.

By following these strategies, you can build a scalable hosting environment on a budget VPS, ready to handle increased loads and growth without necessitating a significant initial investment. This approach ensures that your infrastructure can adapt to changing demands efficiently and cost-effectively.