


How to Manage Domains and Subdomains in Plesk
1. Log in to Your Plesk Panel
- Open your browser and enter your Plesk login URL (e.g.,
yourdomain.com:8443). - Enter your username and password.
2. Adding a New Domain
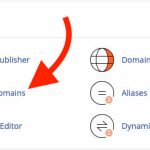
- Go to Websites & Domains
- From the left sidebar, click Websites & Domains.
- Add Domain
- Click Add Domain (or sometimes Add Domain Name).
- Enter Domain Details
- Type your new domain name.
- Choose your hosting type (usually “Website hosting”).
- Set the document root if you want a custom folder (optional).
- Click OK or Add Domain.
- Update DNS Settings
- Make sure your domain’s DNS records point to your Plesk server (you may need to update these with your domain registrar).
3. Adding a Subdomain
- Go to Websites & Domains
- Stay in the Websites & Domains section.
- Add Subdomain
- Click Add Subdomain.
- Enter Subdomain Details
- Type your desired subdomain (e.g.,
blogforblog.yourdomain.com). - Select the parent domain.
- Set the document root folder (by default, Plesk suggests one for you).
- Click OK or Add Subdomain.
- Type your desired subdomain (e.g.,
4. Managing Existing Domains and Subdomains
- In Websites & Domains, you’ll see a list of all your domains and subdomains.
- For each, you can:
- Manage Hosting Settings: Change root directories, enable/disable SSL, set PHP versions, etc.
- Access File Manager: Upload or edit website files.
- Manage DNS Settings: Edit DNS records.
- Remove Domains/Subdomains: Click “Remove” if you no longer need a domain or subdomain (be careful—this deletes related files!).
5. Editing DNS Settings
- Click on DNS Settings for the domain/subdomain.
- Add, remove, or edit DNS records as needed.
- Click Update and Apply Changes when done.
Tips:
- Subdomains are great for creating separate sections of your site (like
shop.yourdomain.comorsupport.yourdomain.com). - Always back up important data before deleting any domains or subdomains.
- Make sure DNS changes can take some time to propagate (anywhere from a few minutes to 24 hours).


